Initial Login
- Login to NetIQ iManager.
- Navigate to the Connector on which you want to configure the trace.
Driver Overview
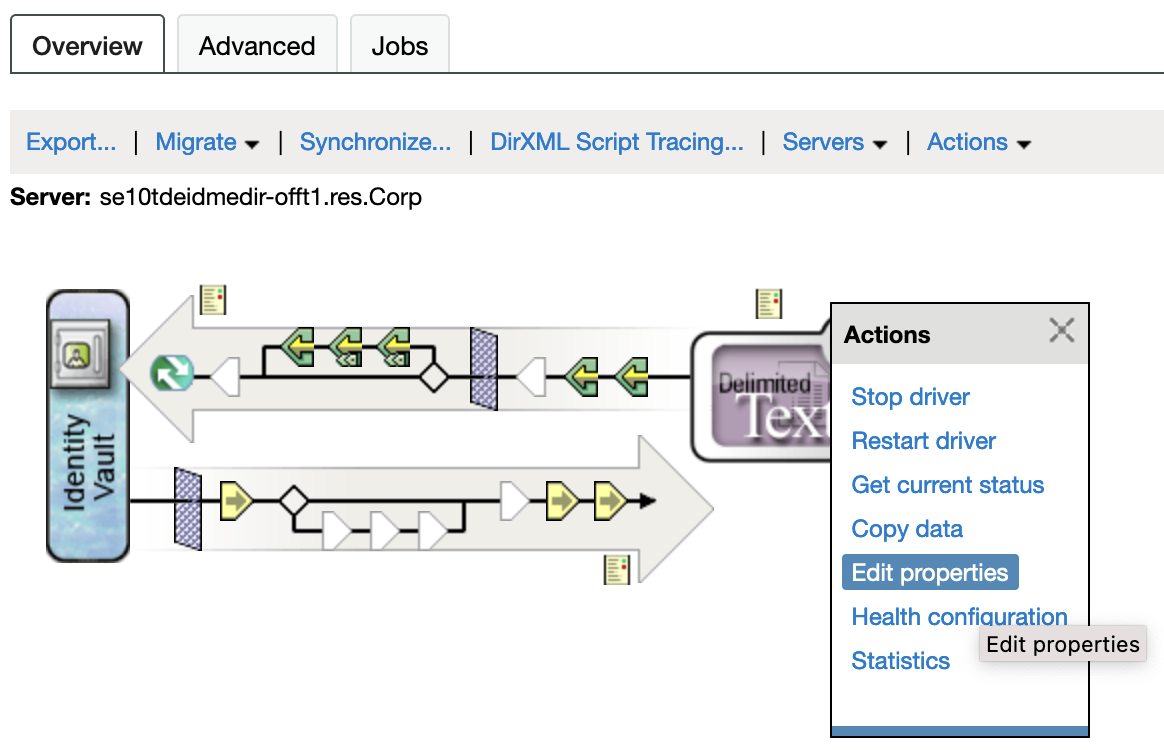
- Either of the following actions will open the Driver Configuration window:
- Clicking anywhere on the Connector icon
- Clicking on the circle in the top right hand corner of the icon, followed by clicking on Edit properties, as shown in the screenshot below
Driver Configuration
- In the window that appears, navigate to the Misc tab and configure the trace as required.
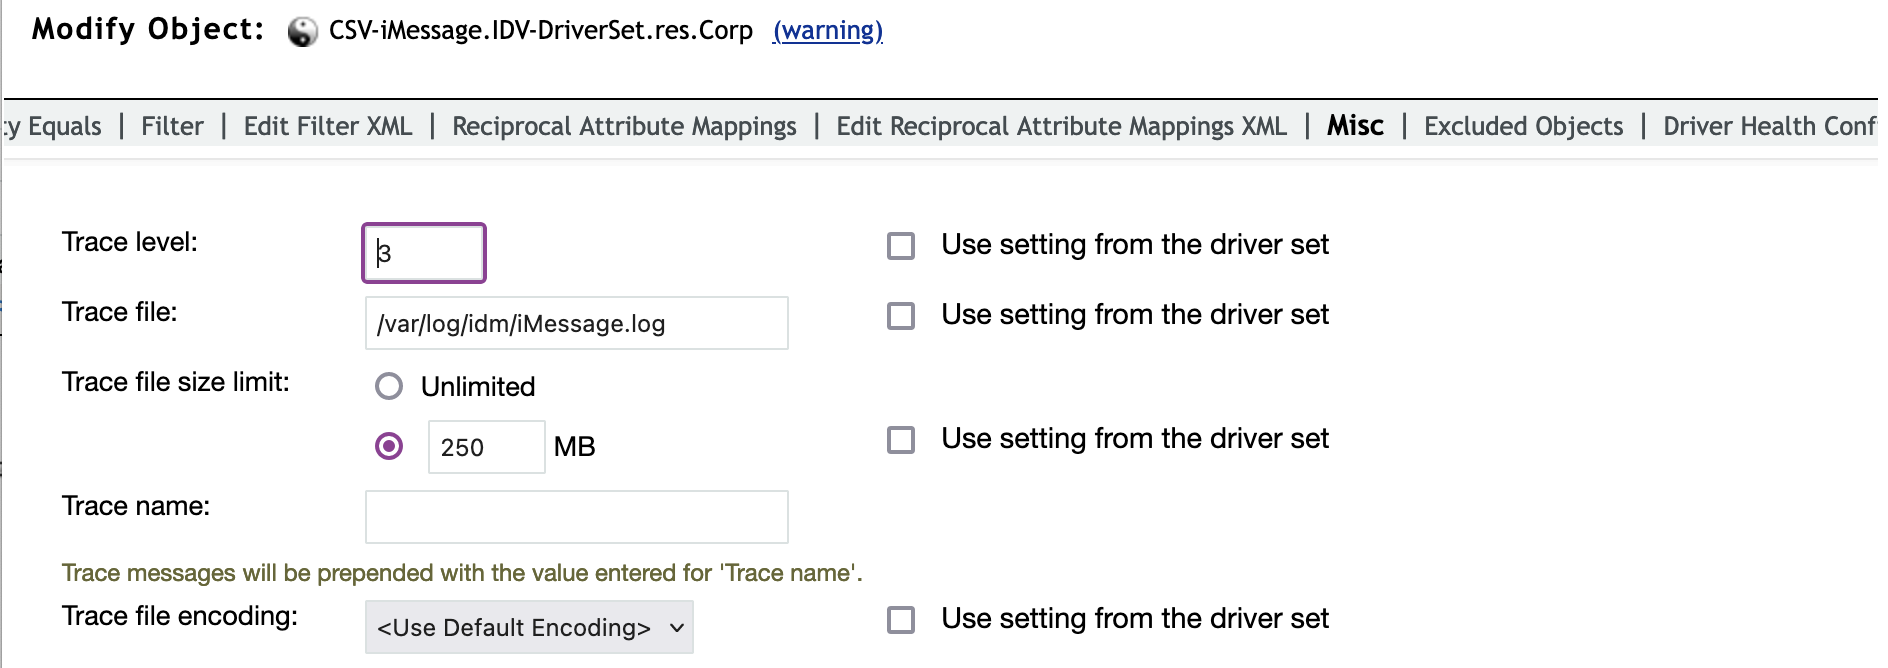
- Click Apply and then OK to complete the change.
- The trace file will be created / updated based on the settings, and it will be located in the directory that was specified in the configuration.
Trace Levels
- Level 0 or Level 1 should be the level that is set when running the Connector in a production environment.
- Level 3 is enough to troubleshoot a Connector issue, and should be the minimum level that is selected when sending the log file to a third party.
- Level 10 provides as much log detail as you would ever need.
To read another one of our recent iManager posts To export Connector code using iManager, click here.